显微镜下的tensorflow—— Allocator
本文首发于个人博客:🔗Wang Junwei’s Blog : Tensorflow Under the MicroScope : Tensor & Allocator
最近读了马伯庸的一本历史科普书 ——《显微镜下的大明》——深受启发,以几个小人物的悲哀写了大明朝的兴衰,每个章节只着眼解决/解释一个或几个小问题,许多篇论文汇总起来,就能在一个方向上形成突破,形成独特的创见。让你拨云见日,豁然开朗。于是,我想以「显微镜下的tensorflow 为题,作为一个系列记录一下我的学习历程。
最近做完的一个项目里,遇到了tf 模型加载完内存不释放的问题,对线上服务稳定性有一定风险,花了很长时间在努力解决内存问题,但还是没时间好好研究一下造成模型更新前后内存不释放的异常的根本原因,年前这段时间较为轻松,记录一下学习Tensorflow的过程。
先看一下tensorflow中最重要的数据结构 tensorflow::Tensor 是如何设计的
1
2
3
4
5
6
7
8
9
10
11
12
13
14
15
16
class RefCounted { public : RefCounted (); void Ref () const bool Unref () const bool RefCountIsOne () const protected : virtual ~RefCounted (); private : mutable std::atomic_int_fast32_t ref_; RefCounted (const RefCounted&) = delete ; void operator =(const RefCounted&) = delete ; };
core::RefCounted 是一个重要基类,用于跟踪对象的引用计数,并在引用计数为零时自动释放对象,辅助实现资源的自动管理和内存管理 。
核心代码是
1
2
3
4
5
6
7
8
9
10
11
12
13
14
15
inline void RefCounted::Ref () const DCHECK_GE (ref_.load (), 1 ); ref_.fetch_add (1 , std::memory_order_relaxed); } inline bool RefCounted::Unref () const DCHECK_GT (ref_.load (), 0 ); if (RefCountIsOne () || ref_.fetch_sub (1 ) == 1 ) { DCHECK ((ref_.store (0 ), true )); delete this ; return true ; } else { return false ; } }
为什么这里需要一行 DCHECK((ref_.store(0), true)); 呢,明明该对象即将销毁,我认为这里将引用计数显世地置0,是一个防止多线程race的UB,将引用计数将为0,避免其他线程对该对象的引用计数做任何改动。
TensorBuffer也是一个基类,用作底层的数据缓冲区,真正持有张量数据的所有内存,代码上看TensorBuffer类也只是一个接口类(提供了->data<T>() 接口 一块内存空间 data_ 按位转换为 对应的数据类型(float、double、int64 etc.)。
1
2
3
4
5
6
7
8
9
10
11
12
13
class TensorBuffer : public core::RefCounted { public : explicit TensorBuffer (void * data_ptr) : data_(data_ptr) { ~TensorBuffer () override {} void * data () const return data_; } template <typename T> T* base () const { return reinterpret_cast <T*>(data ()); } private : vodi* const data_; }
graph TB
		subgraph Buffer
		AA(core::RefCounted) --> AB(TensorBuffer) --> AC(BufferBase) --> AD(Buffer)
		AB --> AE(SubBuffer<_T>)
		end
派生类BufferBase 和 Buffer 在Buffer*上加入了Allocator对象,作为类的内存分配器,为 data_ 申请内存空间:
1 data_ = TypedAllocator::Allocate <T>(a, n, allocation_attr)
1
2
3
4
5
6
7
8
9
10
11
12
13
14
15
16
17
18
19
20
21
22
23
24
25
26
27
28
29
30
31
32
33
34
35
class BufferBase : public TensorBuffer { public : explicit BufferBase (Allocator* alloc, void * data_ptr) : TensorBuffer(data_ptr), alloc_(alloc) { } protected : Allocator* const alloc_; } template <typename T>class Buffer : public BufferBase {public : Buffer (Allocator* a, int64 n) : BufferBase (a, TypedAllocator::Allocate <T>(a, n, AllocationAttributes ())), elem_ (n) { } Buffer (Allocator* a, int64 n, const AllocationAttributes& allocation_attr) : BufferBase (a, TypedAllocator::Allocate <T>(a, n, allocation_attr)), elem_ (n) { } size_t size () const override return sizeof (T) * elem_; } private : ~Buffer () { if (data ()) { if (LogMemory::IsEnabled ()) { RecordDeallocation (); } TypedAllocator::Deallocate <T>(alloc_, static_cast <T*>(data ()), elem_); } } private : T* data_; int64 elem_; };
我个人在阅读这段代码的时候,reinterpret_cast<T*>(data()) 有个疑问,为什么这里用的是data() 而不是 data_ 后来查了一些资料,重新理解了一下面向对象编程的思想 和 private,protected,public 三个可见性的初衷,发现:
data_是一个私有成员变量,而data()是一个公有成员函数。尽管在构造函数中已经将data_初始化为data_ptr,但data_是一个私有成员,外部无法直接访问。因此,在base()方法中,使用data()来获取data_的值是为了确保访问权限的一致性 。
在类内部,使用data()而不是直接访问data_是一个良好的实践。这种做法将data_的实现细节隐藏在类内部,并提供了一种更加抽象和安全的访问方式。如果后续需要对data_的访问方式进行更改,比如增加一些边界检查或其他逻辑,只需要修改data()方法即可,而不会影响到调用base()方法的代码。
使用data()方法也有助于提高代码的可读性和维护性。在类的使用者看来,使用data()方法来获取底层数据的指针更具有语义上的可理解性,而直接访问data_可能会使代码的意图不够清晰
TensorBuffer 类专注于管理张量数据的底层存储:内存分派,数据读写等,甚至会和设备/硬件交互,比如GPU和TPU上的tensor对象的数据存储和数据传输,是Tensor类的唯二成员之一,另一个是TensorShape 这里不做赘述。
节选了部分Tensor代码,构造和内存分配上的部分代码:
1
2
3
4
5
6
7
8
9
10
11
12
13
14
15
16
17
18
19
20
21
22
class Tensor {public : Tensor (DataType type, const TensorShape& shape) : Tensor (get_default_cpu_allocator (), type, shape) { } Tensor (Allocator* a, DataType type, const TensorShape& shape) : shape_ (shape), buf_ (nullptr ) { set_dtype (type); CHECK_NOTNULL (a); if (shape_.num_elements () > 0 || a->AllocatesOpaqueHandle ()) { CASES (type, buf_ = new Buffer <T>(a, shape.num_elements ())); } if (buf_ != nullptr && buf_->data () != nullptr && LogMemory::IsEnabled ()) { LogMemory::RecordTensorAllocation ("Unknown" , LogMemory::UNKNOWN_STEP_ID, *this ); } } private : TensorShape shape_; TensorBuffer* buf_; }
graph LR
		subgraph tensorflow::Tensor::Buffer
		AA(core::RefCounted) --> AB(TensorBuffer) --> AC(BufferBase) --> AD(Buffer)
		AB --> AE(SubBuffer<_T>)
		end

		AD -.-> buf_
		BA(TensorShape) -.-> shape_

		buf_-.-> Tensor
		shape_-.-> Tensor
朴素构造函数 是我们最常用的Tensor 生命方式,指定Type和Shape,就能定义一个Tensor,像这样:
1 tensorflow::Tensor sparse_bias_tensor (tensorflow::DT_FLOAT, tensorflow::TensorShape({sparse_bias.size(), 1 })) ;
这里会用委托构造函数(delegating CTOR),把get_default_cpu_allocator() 拿回来的CPU 内存分配器 给 BufferBase::alloc_
1
2
3
4
5
6
7
8
9
10
11
12
13
14
15
static Allocator* get_default_cpu_allocator () static Allocator* default_cpu_allocator = cpu_allocator (port::kNUMANoAffinity); return default_cpu_allocator; } Allocator* cpu_allocator (int numa_node) { static ProcessStateInterface* ps = AllocatorFactoryRegistry::singleton ()->process_state (); if (ps) { return ps->GetCPUAllocator (numa_node); } else { return cpu_allocator_base (); } }
很显然地,buf_在Tenor的构造函数中,被new成一个字节大小为 shape * sizeof(T) 的内存空间,这里会用到TypedAllocator::Allocate<T>(a, n, AllocationAttributes()) 这个分配器来分配内存。
在上文中,Buffer类的构造函数有一个细节没有展开,TypedAllocator::Allocate<T>(a, n, allocation_attr) 用allocator a 来申请一段内存空间,然后在这个内存空间挨个RunCtor(Run Constructor)
1
2
3
4
5
6
7
8
9
10
11
static T* TypedAllocator::Allocate (Allocator* raw_allocator, size_t num_elements, const AllocationAttributes& allocation_attr) if (num_elements > (std::numeric_limits<size_t >::max () / sizeof (T))) { return nullptr ; } void * p = raw_allocator->AllocateRaw (Allocator::kAllocatorAlignment, sizeof (T) * num_elements, allocation_attr); T* typed_p = reinterpret_cast <T*>(p); if (typed_p) RunCtor <T>(raw_allocator, typed_p, num_elements); return typed_p; }
到此为止,不管是TensorBuffer还是TypedAllocator 都是将allocator作为参数使用,下面,看一下allocator是怎么实现的
1
2
3
4
5
6
7
8
9
10
11
12
13
14
15
16
17
18
19
20
21
22
23
24
25
26
27
28
29
30
31
32
class Allocator {public : virtual void * AllocateRaw (size_t alignment, size_t num_bytes) 0 ; virtual void DeallocateRaw (void * ptr) 0 ; virtual bool TracksAllocationSizes () virtual size_t RequestedSize (void * ptr) virtual size_t AllocatedSize (void * ptr) virtual int64 AllocationId (void * ptr) virtual size_t AllocatedSizeSlow (void * ptr) virtual void GetStats (AllocatorStats* stats) }; class SubAllocator { public : typedef std::function<void (void *, int index, size_t )> Visitor; SubAllocator (const std::vector<Visitor>& alloc_visitors, const std::vector<Visitor>& free_visitors); virtual void * Alloc (size_t alignment, size_t num_bytes) 0 ; virtual void Free (void * ptr, size_t num_bytes) 0 ; protected : void VisitAlloc (void * ptr, int index, size_t num_bytes) void VisitFree (void * ptr, int index, size_t num_bytes) const std::vector<Visitor> alloc_visitors_; const std::vector<Visitor> free_visitors_; };
Allocator 是所有内存分配器的基类,作为一个借口类,定义了最重要的两个接口:AllocateRaw 和 DeallocateRaw。以此可以衍生出各种allocator,比如CPUAllocator,BFCAllocator,GPUAllocator,MKLCPUAllocator等。
为什么要引入SubAllocator呢,官方的解释说是用于进行底层内存分配和释放的对象,它的设计意图是为了在高级别的分配器(例如 CPUAllocator 或 GPUAllocator)之上执行底层的内存分配和释放操作:
灵活性和可扩展性: TensorFlow 支持多种不同的设备和硬件平台,如 CPU、GPU 等,每种设备可能需要不同的内存管理策略和底层实现。通过使用 SubAllocator,可以实现设备特定的内存管理逻辑,并将其与高级别的分配器进行解耦,从而实现更灵活和可扩展的架构性能优化: SubAllocator 可以针对特定的设备或硬件平台进行优化
1
2
3
4
5
6
class AllocatorFactory { public : virtual bool NumaEnabled () return false ; } virtual Allocator* CreateAllocator () 0 ; virtual SubAllocator* CreateSubAllocator (int numa_node) 0 ; };
每一个Allocator,都会有一个对应的工厂类,用来注册到全局单例AllocatorFactoryRegistry 中,按照如下方式获取
1 static Allocator* cpu_alloc = AllocatorFactoryRegistry::singleton ()->GetAllocator ();
1
2
3
4
5
6
7
8
9
10
11
12
13
14
15
16
17
18
19
20
21
22
23
24
25
26
27
28
29
30
31
32
class AllocatorFactoryRegistry { public : void Register (const char * source_file, int source_line, const string& name, int priority, AllocatorFactory* factory) Allocator* GetAllocator () ; SubAllocator* GetSubAllocator (int numa_node) ; static AllocatorFactoryRegistry* singleton () ProcessStateInterface* process_state () const { return process_state_; } protected : friend class ProcessState ; ProcessStateInterface* process_state_ = nullptr ; private : mutex mu_; bool first_alloc_made_ = false ; struct FactoryEntry { const char * source_file; int source_line; string name; int priority; std::unique_ptr<AllocatorFactory> factory; std::unique_ptr<Allocator> allocator; std::vector<std::unique_ptr<SubAllocator>> sub_allocators; }; std::vector<FactoryEntry> factories_ GUARDED_BY (mu_) ; const FactoryEntry* FindEntry (const string& name, int priority) const EXCLUSIVE_LOCKS_REQUIRED (mu_) ; TF_DISALLOW_COPY_AND_ASSIGN (AllocatorFactoryRegistry); };
这个单例用来注册和获取Allocator工厂类,内部定义的AllocatorFactoryRegistry::FactoryEntryd的数据结构用来描述一个AllocatorFactory的
1
2
3
4
5
6
7
8
9
10
11
12
13
14
15
16
void AllocatorFactoryRegistry::Register (const char * source_file, int source_line, const string& name, int priority, AllocatorFactory* factory) mutex_lock l (mu_) ; const FactoryEntry* existing = FindEntry (name, priority); if (existing != nullptr ) { return ; } FactoryEntry entry; entry.source_file = source_file; entry.source_line = source_line; entry.name = name; entry.priority = priority; entry.factory.reset (factory); factories_.push_back (std::move (entry)); }
开发者这里巧妙地用了一个宏语法糖,注册表模式类:
1
2
3
4
5
6
7
class AllocatorFactoryRegistration { public : AllocatorFactoryRegistration (const char * file, int line, const string& name, int priority, AllocatorFactory* factory) { AllocatorFactoryRegistry::singleton ()->Register (file, line, name, priority, factory); } };
AllocatorFactoryRegistration 构造函数会调用 AllocatorFactoryRegistry 类的单例模式的 singleton() 方法来获取注册表的实例,然后调用注册表的 Register() 方法来注册分配器工厂。
1 2 3 4 5 6 7 8 9 10 11 #define REGISTER_MEM_ALLOCATOR(name, priority, factory) \ REGISTER_MEM_ALLOCATOR_UNIQ_HELPER(__COUNTER__, __FILE__, __LINE__, name, \ priority, factory) #define REGISTER_MEM_ALLOCATOR_UNIQ_HELPER(ctr, file, line , name, priority, \ factory) \ REGISTER_MEM_ALLOCATOR_UNIQ(ctr, file, line , name, priority, factory) #define REGISTER_MEM_ALLOCATOR_UNIQ(ctr, file, line , name, priority, factory) \ static AllocatorFactoryRegistration allocator_factory_reg_##ctr( \ file, line , name, priority, new factory)
像这样,
1 REGISTER_MEM_ALLOCATOR ("DefaultCPUAllocator" , 100 , CPUAllocatorFactory);
会生成一个静态的前缀为allocator_factory_reg_的AllocatorFactoryRegistration对象,这个对象的ctor执行的时候,会往AllocatorFactoryRegistry这个单例里面Register一个allocator工厂类。
值得注意的是,这里有几个内置宏[3],可以关注一下
__COUNTER__: 用于生成唯一的标识符。每次 __COUNTER__ 被使用时,它的值都会递增 ,并且在同一个编译单元(translation unit)中,它会始终保持唯一的值,这个宏通常用于在编译时生成唯一的标识符 ,以避免命名冲突或创建临时对象。它可以在宏展开的过程中被使用,用来生成一些在编译时唯一的标识符,比如在宏定义中创建临时变量名、临时函数名等
__LINE__:表示当前源文件中的行号。
__FILE__:表示当前源文件的文件名。
__DATE__:表示编译时的日期,格式为 “Mmm dd yyyy”,例如 “Dec 25 2023”。
__TIME__:表示编译时的时间,格式为 “hh:mm:ss”。
__TIMESTAMP__:表示源文件的最后修改时间。
__func__(C++11 引入):表示当前函数的名称。
__PRETTY_FUNCTION__(GCC 特有):表示当前函数的完整签名。
_WIN32:表示当前编译环境是否为 Windows 平台。
_MSC_VER:表示当前使用的编译器是 Microsoft Visual C++。
__GNUC__:表示当前使用的编译器是 GNU Compiler Collection (GCC)。
__clang__:表示当前使用的编译器是 Clang。
__cplusplus:表示 C++ 标准的版本号。例如,C98 对应值为 199711L,C 11 对应值为 201103L,C17 对应值为 201703L,C 20 对应值为 202002L。
为了更好管理内存,考虑到内存硬件的cpu-numa device/host的差异对CPU访存效率的影响,tensorflow提供了更高层的抽象内存管理,ProcessState:
1
2
3
4
5
class ProcessStateInterface { public : virtual ~ProcessStateInterface () {} virtual Allocator* GetCPUAllocator (int numa_node) 0 ; };
派生类的GetCPUAllocator 的主要构造如下
1
2
3
4
5
6
7
8
9
10
11
12
13
14
15
16
17
18
19
20
21
22
23
24
25
26
27
28
29
30
31
32
33
34
35
36
37
38
Allocator* ProcessState::GetCPUAllocator (int numa_node) { if (!numa_enabled_ || numa_node == port::kNUMANoAffinity) numa_node = 0 ; mutex_lock lock (mu_) ; while (cpu_allocators_.size () <= static_cast <size_t >(numa_node)) { const bool alloc_visitors_defined = (!cpu_alloc_visitors_.empty () || !cpu_free_visitors_.empty ()); bool use_bfc_allocator = false ; Status status = ReadBoolFromEnvVar ("TF_CPU_ALLOCATOR_USE_BFC" , alloc_visitors_defined, &use_bfc_allocator); Allocator* allocator = nullptr ; SubAllocator* sub_allocator = (numa_enabled_ || alloc_visitors_defined || use_bfc_allocator) ? new BasicCPUAllocator ( numa_enabled_ ? numa_node : port::kNUMANoAffinity, cpu_alloc_visitors_, cpu_free_visitors_) : nullptr ; if (use_bfc_allocator) { int64 cpu_mem_limit_in_mb = -1 ; Status status = ReadInt64FromEnvVar ("TF_CPU_BFC_MEM_LIMIT_IN_MB" , 1LL << 16 , &cpu_mem_limit_in_mb); int64 cpu_mem_limit = cpu_mem_limit_in_mb * (1LL << 20 ); DCHECK (sub_allocator); allocator = new BFCAllocator (sub_allocator, cpu_mem_limit, true , "bfc_cpu_allocator_for_gpu" ); } else if (sub_allocator) { DCHECK (sub_allocator); allocator = new PoolAllocator (100 , true , sub_allocator, new NoopRounder, "cpu_pool" ); } else { DCHECK (!sub_allocator); allocator = cpu_allocator_base (); } if (LogMemory::IsEnabled () && !allocator->TracksAllocationSizes ()) { allocator = new TrackingAllocator (allocator, true ); } cpu_allocators_.push_back (allocator); if (!sub_allocator) { DCHECK (cpu_alloc_visitors_.empty () && cpu_free_visitors_.empty ()); } } return cpu_allocators_[numa_node]; }
这段代码里,在获取第numa_code个numa机器对应的运行内存的allocator。
首先,函数检查是否启用了 NUMA(Non-Uniform Memory Access,非均匀存储访问),如果没有启用或者指定的 NUMA 节点是 kNUMANoAffinity,则将 NUMA 节点设置为 0。
然后,函数进入互斥锁保护的临界区,以确保线程安全地对 CPU 分配器进行操作。
接下来,函数检查 CPU 分配器的数量是否小于等于指定的 NUMA 节点。如果不够,则需要创建新的 CPU 分配器。
根据配置,选择合适的 CPU 分配器类型,优先选择 BFCAllocator(Block-First-Comes Allocator),如果不可用则使用 PoolAllocator。
如果选择了 BFCAllocator,还需要设置其内存限制。可以从环境变量中读取配置,设置 BFCAllocator 的内存限制。
创建相应类型的分配器,并将其添加到分配器列表中。
如果启用了内存日志记录,并且分配器不跟踪分配大小,则包装分配器以跟踪分配 ID,以提供更好的日志记录。
最后,返回指定 NUMA 节点的 CPU 分配器。
1
2
3
4
5
6
7
8
9
10
11
12
13
14
15
16
17
18
19
20
21
22
23
24
25
26
class CPUAllocatorFactory : public AllocatorFactory { public : Allocator* CreateAllocator () override { return new CPUAllocator; } SubAllocator* CreateSubAllocator (int numa_node) override { return new CPUSubAllocator (new CPUAllocator); } private : class CPUSubAllocator : public SubAllocator { public : explicit CPUSubAllocator (CPUAllocator* cpu_allocator) : SubAllocator({ }, {}), cpu_allocator_ (cpu_allocator) {} void * Alloc (size_t alignment, size_t num_bytes) override return cpu_allocator_->AllocateRaw (alignment, num_bytes); } void Free (void * ptr, size_t num_bytes) override cpu_allocator_->DeallocateRaw (ptr); } private : CPUAllocator* cpu_allocator_; }; };
这里,CPUAllocator,继承并重写了两个方法
1
2
3
4
5
6
7
8
9
10
11
12
13
14
15
16
17
18
19
20
21
22
23
24
25
26
27
28
29
void * CPUAllocator::AllocateRaw (size_t alignment, size_t num_bytes) override if (num_bytes > LargeAllocationWarningBytes () && single_allocation_warning_count_ < kMaxSingleAllocationWarnings) { ++single_allocation_warning_count_; } void * p = port::AlignedMalloc (num_bytes, alignment); if (cpu_allocator_collect_stats) { const std::size_t alloc_size = port::MallocExtension_GetAllocatedSize (p); mutex_lock l (mu_) ; ++stats_.num_allocs; stats_.bytes_in_use += alloc_size; stats_.peak_bytes_in_use = std::max <int64>(stats_.peak_bytes_in_use, stats_.bytes_in_use); stats_.largest_alloc_size = std::max <int64>(stats_.largest_alloc_size, alloc_size); if (stats_.bytes_in_use > TotalAllocationWarningBytes () && total_allocation_warning_count_ < kMaxTotalAllocationWarnings) { ++total_allocation_warning_count_; } } return p; } void CPUAllocator::DeallocateRaw (void * ptr) override if (cpu_allocator_collect_stats) { const std::size_t alloc_size = port::MallocExtension_GetAllocatedSize (ptr); mutex_lock l (mu_) ; stats_.bytes_in_use -= alloc_size; } port::AlignedFree (ptr); }
很显然,default实现中,最主要的是port::AlignedMalloc 和 port::AlignedFree 两个函数,用来申请和释放内存对齐的内存块
1
2
3
4
5
6
7
8
9
10
11
12
13
14
15
void * AlignedMalloc (size_t size, int minimum_alignment) #if defined(__ANDROID__) return memalign (minimum_alignment, size); #else void * ptr = nullptr ; const int required_alignment = sizeof (void *); if (minimum_alignment < required_alignment) return Malloc (size); int err = posix_memalign (&ptr, minimum_alignment, size); if (err != 0 ) { return nullptr ; } else { return ptr; } #endif }
这里的8bytes就是一个64-bit的机器的寻址带宽,也是内存对齐的长度。
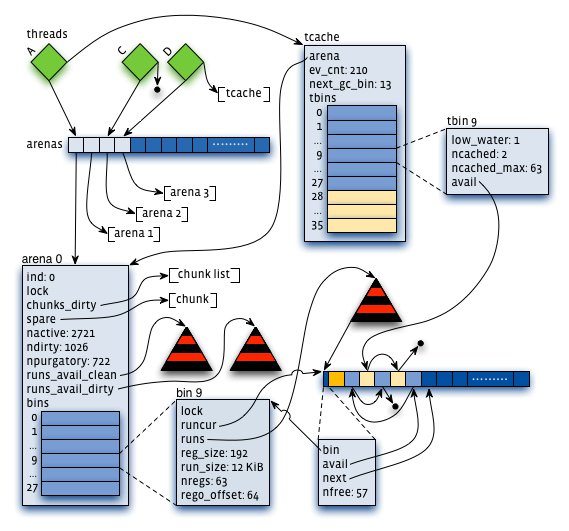
那么,这里我们可以看出tensorflow没有对default的CPU Allocator执行自己的内存分配策略,我们观察到tensorflow用到了jemalloc替换glibc的ptmalloc作为内存管理器,注意到 jemalloc,会替换posix_memalign为je_posix_memalign
1 2 3 4 5 6 7 8 9 10 11 12 13 14 15 16 17 18 19 20 21 22 23 24 25 26 #ifdef JEMALLOC_MANGLE # ifndef JEMALLOC_NO_DEMANGLE # define JEMALLOC_NO_DEMANGLE # endif # define malloc_conf je_malloc_conf # define malloc_message je_malloc_message # define malloc je_malloc # define calloc je_calloc # define posix_memalign je_posix_memalign # define aligned_alloc je_aligned_alloc # define realloc je_realloc # define free je_free # define mallocx je_mallocx # define rallocx je_rallocx # define xallocx je_xallocx # define sallocx je_sallocx # define dallocx je_dallocx # define sdallocx je_sdallocx # define nallocx je_nallocx # define mallctl je_mallctl # define mallctlnametomib je_mallctlnametomib # define mallctlbymib je_mallctlbymib # define malloc_stats_print je_malloc_stats_print # define malloc_usable_size je_malloc_usable_size # define valloc je_valloc #endif
那么这里,相当于tensorflow把tensor的内存生命周期的内存分配策略交给jemalloc来做(哈哈哈,自己也不用tcmalloc是吧)。关于jemalloc的一些解读,会出现在后面的博客里, 已经在努力阅读伦文代码了!
B est-F it-with-C oalescing 是dlmalloc的核心,dlmalloc是一个十分出色的内存分配算法,在计算机科学的历史上曾一度博的头彩,虽然某些设计已经慢慢落后于时代,但是这种BFC的设计哲学催生了很多内存分配器,像Google的tcmalloc 和freeBSD 的 jemalloc 。
使用方法如下
1 allocator = new BFCAllocator (sub_allocator, cpu_mem_limit, true , "bfc_cpu_allocator_for_gpu" );
tensorflow使用的bfc allocator 其实是dlmalloc的一个弱化版本,hey,一起探索一下吧.
dlmalloc提出了两个数据结构,Bin 和 chunk的概念,来描述内存快和内存
Bin :
Bin 是指内存分配器中的一组内存块大小的范围。通常,不同大小的内存块被分配到不同的 Bin 中。每个 Bin 通常有一个固定的大小范围。
TensorFlow 中的 Bin 用于存储不同大小的对象,这些对象是由分配器动态分配和释放的。例如,一个 Bin 可能存储所有小于等于 64 字节的对象,另一个 Bin 可能存储所有小于等于 128 字节的对象,以此类推。
Chunk :
Chunk 是指分配器从操作系统获取的一块连续的内存区域。Chunk 的大小通常是固定的,由操作系统和内存分配器的策略决定。
当内存分配器需要满足一个对象的内存需求时,它会从适当大小的 Bin 中选择一个 Chunk,并将该对象存储在这个 Chunk 中。如果 Chunk 中的可用空间不足,分配器可能会选择另一个 Chunk 或者从操作系统请求更多的内存。
Chunk 通常是内存分配器与操作系统之间的界面,内存分配器通过管理 Chunks 来分配和释放内存。
graph LR
	subgraph Chunk
		prev
		next
		ptr
	end
	subgraph Bin
		free_chunks(std::set< ChunkHandle > free_chunk)
	end
	subgraph Allocator
	  bins("int8_t bins_space_[sizeof(Bin) * kNumBins]")
  end

	Chunk --> free_chunks
	Bin --> bins
1
2
3
4
5
6
7
8
9
10
11
12
13
struct Chunk { size_t size = 0 ; size_t requested_size = 0 ; int64 allocation_id = -1 ; void * ptr = nullptr ; ChunkHandle prev = kInvalidChunkHandle; ChunkHandle next = kInvalidChunkHandle; BinNum bin_num = kInvalidBinNum; uint64 freed_at_count = 0 ; bool in_use () const return allocation_id != -1 ; } };
1
2
3
4
5
6
7
8
9
10
11
12
13
14
15
16
17
18
19
20
21
22
23
24
25
26
struct Bin { size_t bin_size = 0 ; class ChunkComparator { public : explicit ChunkComparator (BFCAllocator* allocator) : allocator_(allocator) { } bool operator () (const ChunkHandle ha, const ChunkHandle hb) const NO_THREAD_SAFETY_ANALYSIS const Chunk* a = allocator_->ChunkFromHandle (ha); const Chunk* b = allocator_->ChunkFromHandle (hb); if (a->size != b->size) { return a->size < b->size; } return a->ptr < b->ptr; } private : BFCAllocator* allocator_; }; typedef std::set<ChunkHandle, ChunkComparator> FreeChunkSet; FreeChunkSet free_chunks; Bin (BFCAllocator* allocator, size_t bs) : bin_size (bs), free_chunks (ChunkComparator (allocator)) {} };
对于Bin来说,在类内用了一个原始内存空间来存储21个bin
1 2 3 4 5 6 7 8 9 10 11 12 13 14 15 Bin* BinFromIndex (BinNum index) { return reinterpret_cast <Bin*>(&(bins_space_[index * sizeof (Bin)])); } size_t BinNumToSize (BinNum index) return static_cast <size_t >(256 ) << index; } BinNum BinNumForSize (size_t bytes) { uint64 v = std::max <size_t >(bytes, 256 ) >> kMinAllocationBits; int b = std::min (kNumBins - 1 , Log2FloorNonZero (v)); return b; } Bin* BinForSize (size_t bytes) { return BinFromIndex (BinNumForSize (bytes)); }char bins_space_[sizeof (Bin) * kNumBins];
在BFC Allocator的Ctor里面,也用到placement new 来原地构造Bin对象如下:
1
2
3
4
for (BinNum b = 0 ; b < kNumBins; b++) { size_t bin_size = BinNumToSize (b); new (BinFromIndex (b)) Bin (this , bin_size); }
很显然,从BinNumToSize 的函数定义上看,BinFromIndex(i) 对的Bin中,chunk的size都是 0x100 << i,如下
在取chunk的时候,像这样:
1
2
3
4
5
6
7
8
9
10
11
12
13
14
15
16
17
18
19
20
21
22
23
24
25
26
27
28
29
void * BFCAllocator::FindChunkPtr (BinNum bin_num, size_t rounded_bytes, size_t num_bytes, uint64 freed_before) for (; bin_num < kNumBins; bin_num++) { Bin* b = BinFromIndex (bin_num); for (auto citer = b->free_chunks.begin (); citer != b->free_chunks.end (); ++citer) { const BFCAllocator::ChunkHandle h = (*citer); BFCAllocator::Chunk* chunk = ChunkFromHandle (h); DCHECK (!chunk->in_use ()); if (freed_before > 0 && freed_before < chunk->freed_at_count) { continue ; } if (chunk->size >= rounded_bytes) { RemoveFreeChunkIterFromBin (&b->free_chunks, citer); const int64 kMaxInternalFragmentation = 128 << 20 ; if (chunk->size >= rounded_bytes * 2 || static_cast <int64>(chunk->size) - rounded_bytes >= kMaxInternalFragmentation) { SplitChunk (h, rounded_bytes); chunk = ChunkFromHandle (h); } chunk->requested_size = num_bytes; chunk->allocation_id = next_allocation_id_++; ++stats_.num_allocs; stats_.bytes_in_use += chunk->size; stats_.peak_bytes_in_use = std::max (stats_.peak_bytes_in_use, stats_.bytes_in_use); stats_.largest_alloc_size = std::max <std::size_t >(stats_.largest_alloc_size, chunk->size); return chunk->ptr; } } } return nullptr ; }
在内存分配器的空闲块列表中查找一个适合请求的内存块。它会遍历所有的内存分配器,对每个内存分配器的空闲块列表进行搜索,直到找到一个大小满足请求的内存块或者遍历完所有的内存分配器。
这段代码中,需要注意一下的有:
FreeChunkSetoperator<std::set<ChunkHandle>, set本身是有序的,于是我们可以遍历free_chunks来获取闲置chunk**RemoveFreeChunkIterFromBin ** 会
在free_chunks->erase(citer) 里面抹掉这个元素,表示这个已经被占用
c->bin_num = kInvalidBinNum; 赋予一个无意义的bin值
⚠️ 当chunk的size大于等于需要的空间的两杯的时候,需要split 当前chunk,避免内存空间浪费
1
2
3
4
5
6
7
8
9
10
11
12
13
14
15
16
17
18
19
20
21
22
23
24
25
26
27
28
29
30
31
32
33
34
35
36
void BFCAllocator::SplitChunk (BFCAllocator::ChunkHandle h, size_t num_bytes) ChunkHandle h_new_chunk = AllocateChunk (); Chunk* c = ChunkFromHandle (h); BFCAllocator::Chunk* new_chunk = ChunkFromHandle (h_new_chunk); new_chunk->ptr = static_cast <void *>(static_cast <char *>(c->ptr) + num_bytes); region_manager_.set_handle (new_chunk->ptr, h_new_chunk); new_chunk->size = c->size - num_bytes; c->size = num_bytes; new_chunk->allocation_id = -1 ; new_chunk->freed_at_count = c->freed_at_count; BFCAllocator::ChunkHandle h_neighbor = c->next; new_chunk->prev = h; new_chunk->next = h_neighbor; c->next = h_new_chunk; if (h_neighbor != kInvalidChunkHandle) { Chunk* c_neighbor = ChunkFromHandle (h_neighbor); c_neighbor->prev = h_new_chunk; } InsertFreeChunkIntoBin (h_new_chunk); }
创建新的 Chunk :
通过指针运算,创建一个新的 Chunk,其起始地址位于当前 Chunk 的末尾加上分割的字节数处。
更新新 Chunk 的指针、大小等属性,将其标记为未使用状态,并继承当前 Chunk 的释放时间信息。
调整链表结构 :
调整当前 Chunk 和相邻 Chunk 之间的指针,将新 Chunk 插入到当前 Chunk 和相邻 Chunk 之间,并更新相邻 Chunk 的指针以保持双向链表的连续性。
将新 Chunk 添加到空闲 Bin :
将新分割出的未使用的 Chunk,根据这个chunk的size,调用BinNumForSize 添加到空闲 Bin 中,以便后续的内存分配时可以使用它。
1
2
3
4
5
6
7
8
9
10
11
12
13
14
15
16
17
18
19
20
21
22
23
24
25
26
27
28
29
30
31
32
33
34
35
36
37
38
39
void * BFCAllocator::AllocateRawInternal (size_t unused_alignment, size_t num_bytes, bool dump_log_on_failure, uint64 freed_before) size_t rounded_bytes = RoundedBytes (num_bytes); BinNum bin_num = BinNumForSize (rounded_bytes); mutex_lock l (lock_) ; if (!timestamped_chunks_.empty ()) { MergeTimestampedChunks (0 ); } void * ptr = FindChunkPtr (bin_num, rounded_bytes, num_bytes, freed_before); if (ptr != nullptr ) { return ptr; } if (Extend (unused_alignment, rounded_bytes)) { ptr = FindChunkPtr (bin_num, rounded_bytes, num_bytes, freed_before); if (ptr != nullptr ) { return ptr; } } if ((freed_before == 0 ) && (!timestamped_chunks_.empty ())) { if (MergeTimestampedChunks (rounded_bytes)) { ptr = FindChunkPtr (bin_num, rounded_bytes, num_bytes, freed_before); if (ptr != nullptr ) { return ptr; } } } if (DeallocateFreeRegions (rounded_bytes) && Extend (unused_alignment, rounded_bytes)) { ptr = FindChunkPtr (bin_num, rounded_bytes, num_bytes, freed_before); if (ptr != nullptr ) { return ptr; } } return nullptr ; }
这段代码中值得注意的是
if (!timestamped_chunks_.empty()):如果时间戳块列表不为空,则尝试合并其中已经释放并且安全可用于一般用途的块。if (Extend(unused_alignment, rounded_bytes)):尝试扩展已分配的内存块以满足请求。如果扩展成功,则再次尝试查找满足请求的内存块。if (DeallocateFreeRegions(rounded_bytes) && Extend(unused_alignment, rounded_bytes)):尝试释放空闲区域并扩展已分配的内存块,以便将它们与未分配的字节组合在一起形成一个较大的区域。
释放也是类似的原理,需要判断一下是否需要合并chunk到更大的bin里面,这里不做赘述。
除了上面提到的主要方法之外,有两个辅助类用来
1
2
3
4
5
6
7
8
9
10
11
12
13
14
15
16
17
18
19
20
21
22
23
24
25
26
27
28
29
30
31
32
33
34
35
36
37
38
39
40
41
42
43
44
45
46
47
48
class AllocationRegion { public : AllocationRegion (void * ptr, size_t memory_size) : ptr_ (ptr), memory_size_ (memory_size), end_ptr_ ( static_cast <void *>(static_cast <char *>(ptr_) + memory_size_)) { DCHECK_EQ (0 , memory_size % kMinAllocationSize); const size_t n_handles = (memory_size + kMinAllocationSize - 1 ) / kMinAllocationSize; handles_.reset (new ChunkHandle[n_handles]); for (size_t i = 0 ; i < n_handles; i++) { handles_[i] = kInvalidChunkHandle; } } void * ptr () const return ptr_; } void * end_ptr () const return end_ptr_; } size_t memory_size () const return memory_size_; } ChunkHandle get_handle (const void * p) const { return handles_[IndexFor (p)];} void set_handle (const void * p, ChunkHandle h) IndexFor (p)] = h; } void erase (const void * p) set_handle (p, kInvalidChunkHandle); } private : void Swap (AllocationRegion* other) std::swap (ptr_, other->ptr_); std::swap (memory_size_, other->memory_size_); std::swap (end_ptr_, other->end_ptr_); std::swap (handles_, other->handles_); } size_t IndexFor (const void * p) const std::uintptr_t p_int = reinterpret_cast <std::uintptr_t >(p); std::uintptr_t base_int = reinterpret_cast <std::uintptr_t >(ptr_); DCHECK_GE (p_int, base_int); DCHECK_LT (p_int, base_int + memory_size_); return static_cast <size_t >(((p_int - base_int) >> kMinAllocationBits)); } void * ptr_ = nullptr ; size_t memory_size_ = 0 ; void * end_ptr_ = nullptr ; std::unique_ptr<ChunkHandle[]> handles_; TF_DISALLOW_COPY_AND_ASSIGN (AllocationRegion); };
ptr_ 成员变量表示分配区域的起始地址,end_ptr_ 表示分配区域的结束地址。memory_size_ 成员变量表示分配区域的大小。handles_ 是一个智能指针,指向一个大小为 memory_size / kMinAllocationSize 的数组,用于存储 Chunk 的句柄。IndexFor 中的强制类型转换是将指针转换为整数类型,以便进行指针的运算。具体来说,uintptr_t 是 C/C++ 标准库中定义的无符号整数类型,用于表示指针值的无符号整数。它的大小足以容纳一个指针,并且在指针和整数之间进行转换时不会丢失精度
1
2
3
4
5
6
7
8
9
10
11
12
13
14
15
16
17
18
19
20
21
22
23
24
25
26
27
28
29
30
31
32
33
34
35
36
37
38
39
40
41
42
43
class RegionManager { public : RegionManager () {} ~RegionManager () {} void AddAllocationRegion (void * ptr, size_t memory_size) auto entry = std::upper_bound (regions_.begin (), regions_.end (), ptr, &Comparator); regions_.insert (entry, AllocationRegion (ptr, memory_size)); } std::vector<AllocationRegion>::iterator RemoveAllocationRegion (std::vector<AllocationRegion>::iterator it) { return regions_.erase (it); } ChunkHandle get_handle (const void * p) const { return RegionFor (p)->get_handle (p); } void set_handle (const void * p, ChunkHandle h) return MutableRegionFor (p)->set_handle (p, h); } void erase (const void * p) return MutableRegionFor (p)->erase (p); } const std::vector<AllocationRegion>& regions () const return regions_; } private : static bool Comparator (const void * ptr, const AllocationRegion& other) return ptr < other.end_ptr (); } AllocationRegion* MutableRegionFor (const void * p) { return const_cast <AllocationRegion*>(RegionFor (p)); } const AllocationRegion* RegionFor (const void * p) const auto entry = std::upper_bound (regions_.begin (), regions_.end (), p, &Comparator); if (entry != regions_.end ()) { return &(*entry);} return nullptr ; } private : std::vector<AllocationRegion> regions_; };
RegionManager 类用于聚合一个或多个 AllocationRegion,提供了从指针到底层 ChunkHandle 的间接映射,允许在多个不连续的内存区域上进行分配。
添加和移除分配区域 :
AddAllocationRegion 方法用于向 RegionManager 中添加一个新的分配区域,该方法会根据分配区域的 end_ptr 进行排序插入,确保分配区域按照内存地址的顺序排列。RemoveAllocationRegion 方法用于从 RegionManager 中移除指定的分配区域。
获取和设置 ChunkHandle :
get_handle 方法根据指针获取对应的 ChunkHandle,通过查找指定指针所属的分配区域,并调用该分配区域的 get_handle 方法来获取对应的 ChunkHandle。set_handle 方法用于设置指定指针对应的 ChunkHandle,通过查找指定指针所属的分配区域,并调用该分配区域的 set_handle 方法来设置对应的 ChunkHandle。
查找分配区域 :
RegionFor 方法根据指针查找对应的分配区域,该方法会使用二分查找(std::upper_bound)来定位指定指针所属的分配区域。如果找到对应的分配区域,则返回该分配区域的指针;如果未找到,则输出致命错误信息并返回空指针。
那么这个类什么时候发挥作用呢,一般是在deallocate的时候,归还指针的时候。
在上述讨论中,我们涉及了 TensorFlow 的 Allocator 概念以及 BFC Allocator 的实现细节。以下是对这些内容的总结:
Allocator 概念 :
Allocator 是 TensorFlow 中用于管理内存分配和释放的接口,允许用户通过注册不同的 Allocator 工厂来选择不同的内存管理策略。
TensorFlow 提供了多种 Allocator,如 CPUAllocator、GPUAllocator 等,以满足不同场景下的内存需求。
BFC Allocator 概述 :
BFC Allocator(Best-Fit with Coalescing)是 TensorFlow 中的一种内存分配器,用于动态管理大量不同大小的内存块。
BFC Allocator 通过将内存分配区域划分为多个不同大小的块(Chunk)来管理内存,同时通过合并空闲块来降低内存碎片化。
BFC Allocator 实现细节 :
BFC Allocator 将内存划分为不同的 Bin,每个 Bin 包含一组特定大小的 Chunk。
BFC Allocator 通过分配合适大小的 Chunk 来满足内存分配请求,使用二分查找来快速定位合适的 Chunk。
BFC Allocator 还包括一些优化策略,如内存分配的对齐和合并,以及基于时间戳的 Chunk 合并等。
AllocationRegion 和 RegionManager :
AllocationRegion 是 BFC Allocator 中的概念,代表一段连续的内存区域,并负责将指针映射到对应的 ChunkHandle。
RegionManager 聚合了多个 AllocationRegion,并提供了从指针到 ChunkHandle 的映射,允许在多个不连续的内存区域上进行内存分配。
综上所述,BFC Allocator 是 TensorFlow 中用于动态管理内存分配的重要组件,通过合理的内存管理策略和数据结构设计,实现了高效的内存分配和释放机制,为 TensorFlow 在不同硬件平台上的高性能计算提供了良好的支持。
https://www.cnblogs.com/jicanghai/p/9535504.html
https://blog.csdn.net/qq_33096883/article/details/77479647
GNU/GCC - Common Predefined Macros
A Memory Allocator by Doug Lea